
Polishing Discs for Aeronautics in 2026
Finishing and polishing
Technical guide to choosing polishing discs for aeronautics: aluminium sheet left bare, stainless cabin and on-board equipment parts, surfaces going to anodising and parts with a roughness specified on the drawing, without eating into the cladding or leaving compound residue.
These are the 7 criteria we recommend reviewing:
- Why you are polishing: visible finish, surface preparation or drawing roughness
- Cladding and thickness: how much metal polishing may remove
- Grit sequence: from the last dressing mark to the shine
- Compound to suit the metal and the finish required
- Cleaning off compound residue before anodising, painting or inspection
- Heat and pressure on thin sheet and heat-treated alloys
- Format and machine to suit the surface: large panel, small part or radius
In an aerospace shop polishing comes last, once the part has been cut, ground and dressed. It might be the aluminium panel of a vintage aircraft delivered unpainted, the stainless trim of an on-board galley module, a machined part going to anodising or an area of a component with a roughness stated on the drawing. Choosing the right polishing discs for aeronautics decides whether that surface comes out as specified or has to be started again.
What is particular about the sector is how little may be removed. Sheet carries thin cladding and anodic layers, the alloys tolerate heat poorly and almost everything that is polished then goes to a treatment or an inspection that will not accept compound residue. Here polishing is measured by how much metal is preserved.
Badly planned polishing shows up late: cladding that has been cut through appears as corrosion, crossed scratches come to light after anodising and compound residue stops the sealant from bonding. Below are the criteria we apply, how they change by surface and the mistakes we see most.
This guide covers polishing and buffing. Weld dressing and edge breaking with a flap disc, the previous stage, are in flap discs for aeronautics; burr and excess material removal, in grinding discs for aeronautics; and cutting, in cutting discs for aeronautics. For product criteria for the family regardless of sector, the reference is polishing discs for metal fabrication.
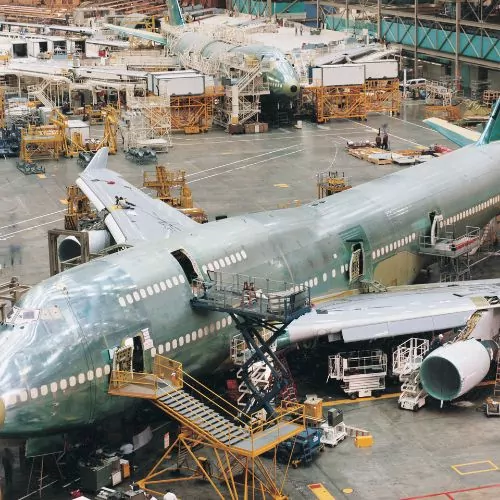
7 criteria for choosing polishing discs in aeronautics
1. Why you are polishing: visible finish, surface preparation or drawing roughness
In aeronautics there are three reasons for polishing, and they have little in common. The first is the visible finish: unpainted aluminium sheet on general aviation or vintage aircraft, and stainless trim and parts in the cabin. The second is the preparation of a surface that will receive anodising or another coating, which reproduces whatever marks lie beneath. The third is functional: an area with an Ra roughness stated on the drawing, where what is measured is not the shine but the profile.
Each goal ends the sequence at a different point. The visible finish ends with felt and buffing compound; preparation for anodising stops at a fine, clean satin finish; drawing roughness is checked with a roughness tester, not by eye. It is worth having this in writing before choosing a consumable.
2. Cladding and thickness: how much metal polishing may remove
Much 2024 and 7075 aluminium sheet carries a cladding of high-purity aluminium that protects it from corrosion. Polishing that layer makes it shine, but every pass with a cutting abrasive takes thickness off it, and if it is cut through the base alloy is left exposed. On anodised parts the same happens with the anodic layer.
That is why on clad sheet polishing is done with compounds and felt, which remove very little, and cloth discs or coarse grits are avoided except to remove a specific defect that the work instruction allows to be treated. If in doubt, the applicable manual or the engineering office states how much may be dressed.
3. Grit sequence: from the last dressing mark to the shine
Polishing can only remove the marks left by the previous step if you go up through the grits in an orderly way. If the part arrives from flap disc dressing at 120 grit, jumping straight to felt and compound leaves the scratches under the shine, and they show against the light. A unitised cloth disc in 320, 600 and 1200 grit covers that intermediate stretch on a hook-and-loop pad.
On stainless and satin-finished areas, a surface conditioning abrasive in Medium or Very Fine evens out the scratch pattern without deepening it. Change working direction between steps: that way you can see straight away whether marks from the previous step remain before moving on.
4. Compound to suit the metal and the finish required
Compounds are not interchangeable. Pink compound is used for pre-polishing, blue for medium polishing, white compound for dry buffing and green for greasy polishing. On aluminium, tallow paste extends abrasive life and prevents loading, which on large sheet shows in the number of discs used.
The practical rule is one wheel per compound: a felt that has worked with a cutting compound and then moves to a buffing one carries coarse grit and scratches what it should be brightening. Mark each wheel with the compound and the metal it is used for.
5. Cleaning off compound residue before anodising, painting or inspection
Polishing compounds use greases and waxes as binders, and their residue stays in pores, rivets and joints. On a part going to anodising, paint or sealant, that residue stops the treatment from taking evenly and shows up as stains or poor adhesion.
The same applies to inspection: a surface with a film of compound is not fit for penetrant testing. That is why polishing ends with degreasing to the shop procedure, not when the machine is switched off. If the part is left as bare metal, anti-fingerprint is useful for later maintenance of stainless.
6. Heat and pressure on thin sheet and heat-treated alloys
Felt and cotton generate a lot of frictional heat, and on thin aluminium sheet that heat builds up quickly. Excessive pressure can mark the sheet, distort it locally or, on heat-treated alloys, heat the area more than is advisable.
Work at the speed stated for the consumable, with light pressure and the disc always moving. If the sheet is too hot to touch by hand, stop and let it cool. A pad with soft foam, such as the 11 mm one, spreads pressure better on curved surfaces.
7. Format and machine to suit the surface: large panel, small part or radius
A fuselage panel or a fairing calls for a random orbital sander or polisher with a 115 to 178 mm hook-and-loop disc, which leaves an even finish on large, curved surfaces. A small cabin part or a fitting with radii calls for something else: felt bobs on a 6 mm shank in a straight grinder, which reach where the disc cannot.
Defining formats before starting avoids improvisation: finishing a detail with whatever is to hand leaves a different texture exactly where it is most visible. Crank felt-core wheels, from 30 to 250 mm, cover almost every corner.
Applications and technical table by surface type
With polishing discs for aeronautics, it pays to organise the choice by surface and destination rather than by material. The same aluminium sheet calls for different polishing if it stays visible, if it is going to anodising or if a dressed area simply has to be blended in.
The table summarises the most frequent situations, the constraint that rules and what the consumable must deliver.
| Surface and destination | Main constraint | What the consumable must deliver |
|---|---|---|
| Clad aluminium panel left visible | Thin cladding that must not be cut through. | Felt and buffing compound, with minimal metal removal. |
| Stainless cabin or on-board equipment part | Uniform finish with no ferritic contamination. | Surface conditioning dedicated to stainless and a continuous satin finish. |
| Machined aluminium part going to anodising | Anodising reproduces scratches and stains. | Fine, even satin finish and a degreased surface. |
| Area with an Ra roughness stated on the drawing | Measured with a roughness tester, not by eye. | Stable, repeatable grit sequence. |
| Small fitting or part with radii | Limited access and edges that get rounded. | Felt bob on a shank and fine control in a straight grinder. |
Bare aluminium sheet in general aviation and restoration
This is the most delicate case because visible finish and thin cladding come together. The sheet is washed and degreased, polished panel by panel with felt and compound, and finished with a buffing compound. Defects the compound does not remove are treated locally, and only if the manual allows it.
Continuity between panels is what gets looked at most: a panel with a different shine from the one next to it is noticeable from a distance. Work with the same compounds, the same machine and the same order across the whole aircraft.
Stainless in cabins, on-board galleys and equipment
Trim, galley work surfaces and equipment housings are often made in stainless with a satin finish. The goal is a uniform, continuous scratch pattern, with no brighter areas next to welds or bends.
In this work surface conditioning performs better than felt, because it evens out the surface without over-brightening it. The consumables must be kept for stainless and must never have touched carbon steel.
Preparing parts before anodising
Anodising does not hide defects: it reproduces them. A scratch, a more polished area or compound residue shows up in the anodic layer as a mark or a stain of a different colour. That is why preparation aims for a uniform surface, not necessarily a bright one.
We recommend finishing with a fine satin finish in a single direction and not using greasy compounds at this step. If they have been used, the part must go through the procedure’s degreasing before entering the line.
Common mistakes when polishing aerospace parts
The underlying mistake is treating polishing as a cosmetic step, when in this sector it affects corrosion, subsequent treatment and inspection.
Polishing clad sheet with a coarse-grit cloth disc
To remove a mark quickly, a 120 grit disc is run over it and the cladding disappears in that area. The sheet is left unprotected exactly where there was a defect. On clad sheet, a defect is only treated if the manual allows it, and with minimal removal.
Using the same felt wheel with several compounds
The wheel retains the previous compound. Moving from a cutting compound to a buffing one with the same felt scratches the surface it should be brightening. One wheel per compound, marked.
Leaving compound residue before anodising, painting or sealing
Grease and wax residue in rivets and joints causes stains in anodising and adhesion failures in paint and sealants. Degreasing is part of polishing.
Skipping grit steps to save time
Going straight from flap disc dressing to buffing leaves scratches that the felt does not remove and that show after anodising or against the light. Go up through the grits in order and check each step before the next.
Abrasteel consumables for polishing in aeronautics

Unitised cloth hook-and-loop disc
Compact abrasive for intermediate and final polishing, in grits from 120 to 1200, leaving a very low roughness before buffing.

Hook-and-loop surface conditioning disc
For surface refining, from Extra Coarse to Very Fine, in 115, 125 and 178 mm on hook-and-loop.

Felt crank disc with hook-and-loop backing
For polishing and buffing with a random orbital machine, medium density and 115 mm, with quick hook-and-loop changeover.

Liquid polishing and buffing compound
In liquid form so it spreads evenly and prepares the metal before final buffing.
For mounting the hook-and-loop discs there is the hook-and-loop backing pad, with 11 mm foam, and the other felt and cotton formats are in string, cotton and felt discs. All the compounds are in polishing pastes, with tallow paste for aluminium, and the technical catalogue lists sizes and speeds. If you are looking for the step-by-step mirror finish technique, see the guide to achieving a mirror polish.
Abrasteel as a technical supplier for aeronautics
At Abrasteel we work with finishing, maintenance and restoration shops that polish parts for the aerospace sector. The technical conversation does not start with the product but with the surface: what alloy it is, whether it is clad or anodised, whether it stays visible or goes to treatment, and what inspection comes next.
- We match the grit and compound sequence to the part’s destination: visible finish, anodising or drawing roughness.
- We separate wheels and compounds by metal, with references kept for aluminium and stainless.
- We provide the technical data sheet for each reference and the batch data for what we supply, for your records.
- We keep the same references over time, so the finish does not change from one batch of parts to the next.
If you have aerospace parts or panels to polish and want to settle the sequence before starting, you can write to us from the contact page and we will review your case. Validation of the consumable within your process is the responsibility of your quality system and, where it requires it, your customer; we give you the technical information to carry it out.
The complementary operation, weld dressing and edge breaking before polishing, is covered in flap discs for aeronautics.
Frequently Asked Questions (FAQs)
What is the difference between this guide and the one on flap discs for aeronautics?
The flap disc guide covers dressing: blending the weld, breaking edges and leaving a clean transition. This one covers the next step, polishing and buffing, which is done with unitised cloth, surface conditioning, felt and compounds.
Can clad aluminium sheet be polished without damaging the cladding?
Yes, if it is polished with felt and compound, which remove very little metal, and cloth discs or coarse grits are avoided. Every polish takes off some thickness, so defects are treated locally and only if the applicable manual allows it.
Which compound is best for bringing aluminium to a shine?
The usual approach is to pre-polish with a cutting compound such as pink and finish with a buffing one such as white, each on its own wheel. Tallow paste helps keep the abrasive from loading on aluminium.
Does a part need polishing before it is anodised?
It needs preparing, which is not the same thing. Anodising reproduces the scratches and stains on the surface, so the aim is a fine, even satin finish with no compound residue. A mirror shine is not needed unless the drawing calls for it.
How do I clean off compound residue after polishing?
With the degreasing set out in the shop procedure, paying particular attention to rivets, joints and corners where compound builds up. Without that step, anodising, paint, sealants or penetrant testing do not work on a clean surface.
Can I polish stainless and aluminium with the same discs?
It is not recommended. Wheels and abrasives retain particles and compound, and crossing between metals contaminates the stainless and scratches the aluminium. Keep a set for each metal and mark it.
Abrasteel advice
Polishing aerospace panels or parts?
We help you settle grit and compound to suit the part’s destination.
Contact us
Leave us your details and one of our sales representatives will contact you shortly.